
Stock & Noble
DIY Post and Rail Fence: Top Mistakes to Avoid as per Experts
- BY Georgie Beetham
Have you ever started a DIY fence project only to find it doesn’t turn out as expected? Maybe the posts aren’t straight, or the rails don’t fit properly. It’s frustrating, right? You’re not alone.
Building a post and rail fence might seem simple, but many DIY enthusiasts find themselves stuck with a crooked, unstable fence that doesn’t stand the test of time. This can be heartbreaking, especially after putting in so much effort. We understand how tough it can be to get everything right on your own.
The first step would be to learn whether your fencing is good for taking up as a DIY project or not. Once you’re sure and ready to start the installation, understanding the common mistakes and knowing how to avoid them can save you time and ensure your fence is both stable and beautiful.
We provide the finest fencing solutions to property owners across Australia and New Zealand and help them create gorgeous properties. With years of experience in guiding DIYers through their fencing projects, we know exactly where things tend to go wrong. Our knowledge allows us to provide you with practical, tried-and-tested advice that can help you avoid common pitfalls.
In this article, you’ll learn the top mistakes to avoid when building a post and rail fence. From ensuring correct post spacing to choosing the right materials, we’ll guide you step by step to ensure your fence is durable, straight, and aesthetically pleasing. By the end of this read, you’ll have the confidence and knowledge to tackle your fencing project with ease.
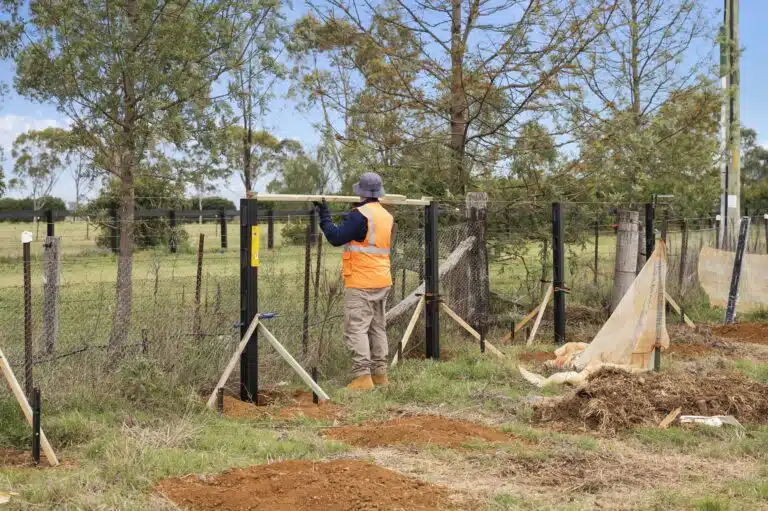
While we’ve mostly discussed the installation of Premium Steel Post and Rail Fencing, morticed timber has a similar process and most of the mistakes are relevant to its installation as well.
Mistake 1: Incorrect Spacing Between Posts
One of the most common mistakes is not spacing the posts correctly. Posts should be set in precise locations to avoid gaps that are too large or too small for the rails. The best way to ensure accurate spacing is to use a spacing marker made of a block of timber. This marker should measure the correct distance between each post as you’re setting it. This simple tool can prevent the need to trim panels or deal with gaps that don’t fit the rails properly.
Mistake 2: Starting with Only One End Post
Many DIYers make the mistake of starting from one end and working their way along the fence line. However, it’s much more effective to start by setting your two end posts first. Once these are in place, put a string line on the top so you have a consistent height to work towards. This ensures your fence will be level and look professional.
Mistake 3: Not Accommodating Undulation
If your ground is uneven due to rocks or slopes, your fence line will also have high or low points. For a successful installation, it’s crucial to accommodate these variations.
Start by setting your middle posts or wherever the land has significant changes in height. Set your post to the right height and then using the string line that has been strung between the start and end posts, pin the line to the correct height. This now provides you with a line that follows the contour of the land.
This approach helps the top rail of the fence look beautiful at the end of the project as it follows the undulation smoothly.
Mistake 4: Digging Narrow Holes for Posts
Another common mistake is digging narrow holes for the posts. In our experience, the diameter of the hole should be oversized by at least 100 mm. An oversized hole allows you to adjust the post for perfect alignment, ensuring the spacing is correct. It also helps you move the posts and make them as straight as possible.
For example, if your post is 100 mm in diameter, we would recommend using a 300mm auger to dig the holes. While this may require more concrete to fill up and install the posts, it ensures you can get the post spacing correct, and also the post will stay straight in both directions without the frustration of having to re-dig or enlarge the hole. This leads to a better overall installation experience.
If you are looking for specific info on fence posts, check out answers to the most commonly asked questions.
Mistake 5: Incorrect Gate Post Installation
When installing premium steel fences where gates are part of the system, it’s sometimes better to install the round gate posts slightly higher than specified in the schematics.
This allows you to get the correct height and alignment. when installing the gate, ensuring a perfect fit. If the end gate post is higher rather than lower, you can cut the round gate post down to match the desired height, which saves time and results in a better-looking gate.
Mistake 6: Wrong Post Spacing on Steep Ground
On steep ground or slopes, it’s often best to make the post spacing slightly narrower. This helps the rails fit securely. As the rails are a fixed length and if the post spacing is just too far apart the rails won’t hold incorrectly, resulting in an insecure fence. The exact spacing adjustment will depend on the gradient of your project, but keeping the spacing consistent helps in maintaining the fence’s structural integrity.
If you have a steep slope on your property, it’ll be worth learning about calculating the gradient of your slope for fence installation.
Mistake 7: Using Rapid Set Concrete for Steel Fences
Avoid rapid-set concrete for steel fences: Rapid-set concrete reacts to steel and does not have the high strength that is needed to hold your fence tall and straight. This is why we recommend using regular concrete, it might take longer to set at the time, but you’ll have a fence that stays upright for a lot longer. Learn how to mix concrete for post and rail fencing.
Special Considerations for Timber Posts and Rails
Timber vs. steel posts and rails: The above points also apply to morticed timber posts and rail fences. Timber is generally heavier than steel, which means you need to use more strength and caution when working with it. Ensure your holes are correctly sized and that you have adequate support to handle the weight and stress of timber posts.
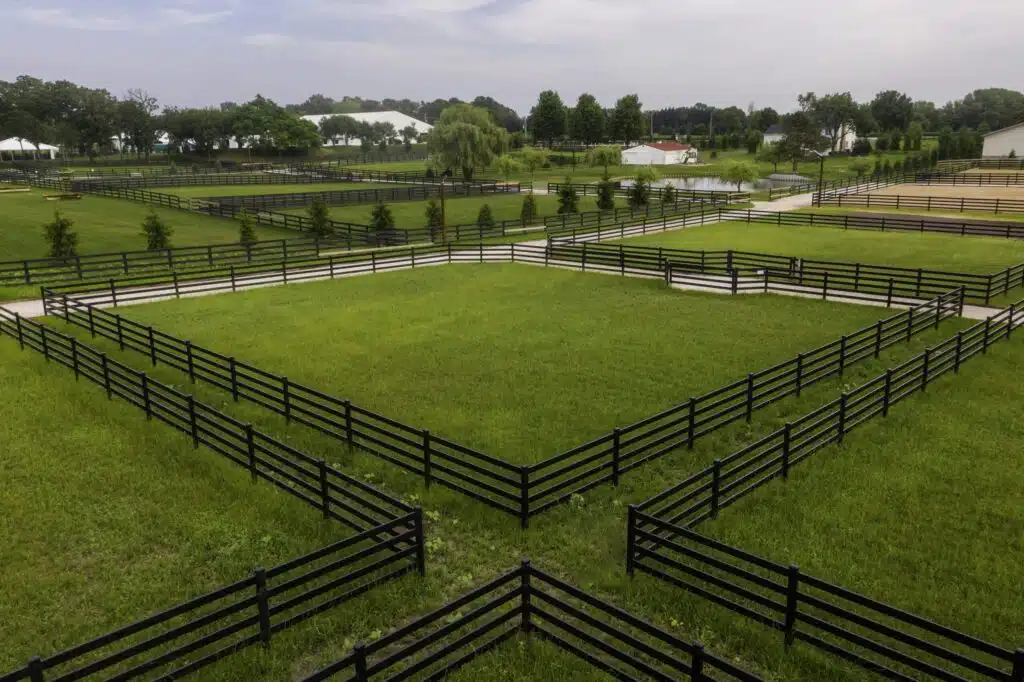
Ready to Build Your Post and Rail Fence?
Building a DIY post and rail fence can be both a challenging and rewarding task. It’s easy to assume that installing a few posts and rails is straightforward, but as we’ve highlighted, several common mistakes can derail your project. By being aware of these pitfalls and following expert advice, you can save time, effort, and frustration.
Remember to get your post spacing right, start with two end posts, accommodate land undulations, dig appropriately sized holes, install gate posts at the right height, adjust the spacing on steep ground, and choose the right concrete for your project.
If you’ve already chosen your fencing and are eager to install it, we recommend checking out a detailed step-by-step process of installing your premium steel or timber post and rail fence. With some experience, knowledge of the right process and handy resources, you can build a stable fence, that looks great and matches your vision as well as expectations.
In case you get stuck at any point during installation or have a question, our team of experts is there to guide you. Connect with them and they will help you every step of the way to create a safe and beautiful property.


Great insights! Ensuring accurate post spacing with a timber gauge and setting both end posts before aligning with a string line can make all the difference. Especially on uneven terrain, following the ground’s contour ensures a smooth top rail. Plus, choosing regular concrete over rapid set truly improves long-term stability.